
By Harry Cruse | TasteSavory
Chicken breast has a reputation for turning out dry, and it’s mostly earned. It’s lean, so there’s very little fat to cushion it, and the window between cooked through and overcooked is short. The good news is that dry chicken is usually the result of a few fixable habits rather than bad luck. This guide covers five techniques (even thickness, salting ahead, a properly hot pan, a thermometer, and resting), explains what each one does, and ends with a simple pan-seared method you can adapt to almost any recipe.
The short answer
- Pound or slice the breast so it’s an even thickness, about ¾ inch (2 cm).
- Salt it ahead of time, either as a dry brine or a short wet brine.
- Pat it dry and cook it in a preheated pan without crowding.
- Cook to 165°F (74°C) in the thickest part, measured with an instant-read thermometer.
- Rest it for about 5 minutes, then slice against the grain.
Why chicken breast dries out
As muscle fibers heat up, they tighten and squeeze out moisture, and the further past done the meat goes, the drier it gets. Lean breast meat has little fat to make up for that loss. Two habits cause most of the trouble. The first is uneven thickness: a breast is thick at one end and thin at the other, so the thin end is overcooked by the time the thick end is done. The second is cooking by time or by guesswork instead of by temperature. Every technique below targets one of those two problems.
Technique 1: Even out the thickness
Place the breast between two sheets of parchment or plastic wrap and gently pound it with a rolling pin or the bottom of a heavy skillet, starting at the thick end, until it’s about ¾ inch (2 cm) thick all over. If you’d rather not pound it, slice a thick breast horizontally into two thinner cutlets instead. Either way, the whole piece finishes cooking at about the same moment, and the cooking time drops to just a few minutes per side.
Technique 2: Salt ahead of time
Salting the chicken before it hits the pan generally helps it hold on to more moisture as it cooks, and it seasons the meat beyond the surface. Choose one of these methods.
- Dry brine (easiest): Sprinkle about ¾ teaspoon of fine salt per pound (450 g) of chicken evenly over all sides. Place it on a plate or rack, uncovered, in the refrigerator for at least 30 minutes and up to 24 hours. Don’t add more salt when you cook it.
- Quick wet brine: Dissolve about 35 g (1¼ oz) of fine table salt, roughly 2 tablespoons, in 4 cups (about 1 liter) of cold water. Kosher salt is coarser, so weigh it if you can. Submerge the chicken for 15–30 minutes in the refrigerator, then lift it out and pat it thoroughly dry. Brining much longer can leave the meat salty and spongy.
One caution: check the package. Some chicken is sold “enhanced” with a salt solution already added, and brining it again will make it too salty.
Technique 3: Dry surface, hot pan, no crowding
Pat the chicken dry with paper towels. Surface moisture turns to steam and stops the meat from browning, which is how you end up with pale, rubbery chicken. Heat a skillet over medium-high for a couple of minutes, then add a tablespoon of oil with a high smoke point, such as avocado or vegetable oil. The oil should shimmer before the chicken goes in. Leave space between the pieces so the pan stays hot, and don’t move the chicken for the first few minutes. It releases from the pan on its own once a golden crust has formed.
Technique 4: Cook to temperature, not time
An instant-read thermometer is the single most useful tool for juicy chicken. Insert it into the thickest part of the breast, and take the chicken off the heat when it reads 165°F (74°C), the safe temperature recommended by the USDA. Color and clear juices are unreliable guides, and cutting into the meat to check lets juices escape. The temperature also keeps climbing slightly as the chicken rests, so don’t leave it in the hot pan while you wait. If the outside is browned but the center isn’t at temperature yet, lower the heat rather than raising it.
Technique 5: Rest, then slice against the grain
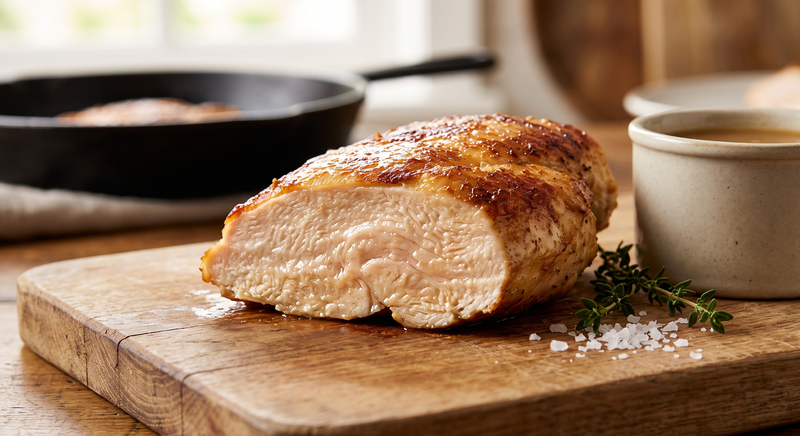
Move the chicken to a board or plate and let it rest for about 5 minutes. This gives the juices time to settle back through the meat instead of running out onto the board. Then slice across the visible muscle fibers rather than along them. Shorter fibers make each bite more tender.
A simple pan-seared method
Serves 2
Ingredients
- 2 boneless, skinless chicken breasts (6–8 oz / 170–225 g each)
- About ¾ teaspoon fine salt, applied ahead of time as in Technique 2
- ¼ teaspoon black pepper
- 1 tablespoon neutral oil, such as avocado or vegetable oil
- 1 tablespoon unsalted butter (optional)
Instructions
- Dry brine the chicken, then pound it to an even ¾ inch (2 cm). If you used a wet brine, pat the chicken very dry instead.
- Season with the pepper. Heat the oil in a 12-inch skillet over medium-high until it shimmers.
- Add the chicken with space between the pieces. Cook without moving it for 4–5 minutes, until deep golden and it releases easily from the pan.
- Flip, reduce the heat to medium, and cook 4–6 minutes more. If using butter, add it now and spoon it over the chicken. Start checking the temperature early.
- Remove the chicken when the thickest part reads 165°F (74°C). Rest 5 minutes, then slice against the grain.
Thicker breasts: Sear them 2–3 minutes per side, then finish in a 400°F (200°C) oven until they reach 165°F. Timing varies with thickness, so rely on the thermometer. These times assume breasts pounded to about ¾ inch.
Troubleshooting
- Still dry: The chicken most likely went past 165°F. Check earlier, take it off the heat as soon as it reaches temperature, and consider cooking thinner cutlets.
- Too salty or spongy: The brine was too long, too strong, or the chicken was already enhanced with a salt solution. Shorten the brine, or use the dry-brine method with less time.
- Pale and rubbery: The surface was wet, the pan wasn’t hot enough, or the pieces were crowded. Pat the chicken dry, preheat the pan properly, and cook in batches if needed.
- Sticks to the pan: It was moved too soon. Give it a few more minutes, and it will release once a crust has formed.
- Thin end dry, thick end underdone: The thickness was uneven. Pound it or slice the breast into cutlets before cooking.
Seasoning and serving ideas
Plain salted chicken is a good base, so keep the seasoning simple. Garlic powder and paprika make an easy rub, and lemon zest with dried herbs suits a lighter meal. A squeeze of lemon after cooking brightens the meat. Sliced juicy chicken works over salads, in grain bowls, and in sandwiches. It also makes a good protein to stir into our Creamy One-Pot Garlic Parmesan Pasta just before serving.
Storage and reheating
Refrigerate cooked chicken in an airtight container within two hours of cooking, and eat it within 3–4 days. Reheat gently, covered, with a splash of broth or water, until it’s hot throughout (165°F / 74°C). Reheating at lower power or over low heat helps prevent it from drying out again. Cooked chicken can be frozen, and it holds up best when it ends up in soups, pastas, or casseroles.
FAQ
Should I wash chicken before cooking it?
No. Food-safety agencies such as the USDA advise against rinsing raw chicken, because water can splash bacteria around your sink and counters. Cooking it to 165°F (74°C) is what makes it safe.
Do I really need a thermometer?
It’s strongly recommended. Chicken can look done and still be undercooked, or look pale and be overcooked, so temperature is the only reliable check.
Do these techniques work for chicken thighs?
Yes, though thighs are far more forgiving because they contain more fat. They also need to reach at least 165°F (74°C), and many cooks prefer them cooked a little further for a more tender texture.
Is pink chicken always undercooked?
Not necessarily. Color isn’t a dependable indicator either way, so go by the thermometer reading.
Conclusion
Juicy chicken breast comes down to a handful of habits: even thickness, salt ahead of time, a hot pan and a dry surface, a thermometer, and a short rest. None of them is difficult, and together they take much of the guesswork out of cooking chicken. Try the pan-seared method once as written, then apply the same steps to whatever recipe you’re making next.