
By Harry Cruse | TasteSavory
A food thermometer is one of the least expensive ways to improve everyday cooking. Recipe times are only estimates, because ovens run hot or cool, pans vary, and no two pieces of meat are exactly the same thickness. A thermometer replaces the guesswork with a number, which helps you avoid both undercooked and overcooked food. This guide covers how to choose one, where to put the probe, how to check that it’s accurate, and which temperatures to aim for.
The short answer
- A digital instant-read thermometer is the best all-purpose choice for most home cooks.
- Insert the tip into the thickest part of the food, away from bone, fat, and the pan.
- Wait until the number stops changing before you read it.
- Check accuracy occasionally with an ice-water test.
- Clean the probe between raw and cooked foods.
Why temperature beats time
Cooking times depend on the starting temperature of the food, its thickness, the size of the pan, and how accurate your oven is. Color and texture are unreliable too. Chicken can look done and still be undercooked, and a burger can turn brown before it reaches a safe temperature. A thermometer measures what actually matters, which is the temperature at the center of the food. It also helps with quality, not only safety. Knowing exactly when a chicken breast is done keeps it from drying out, as we explain in our guide to keeping chicken breast juicy.
Choosing a thermometer
- Digital instant-read: A handheld probe with a display that settles on a reading within a few seconds. It’s the most useful all-rounder for steaks, chicken, burgers, fish, and casseroles. Most aren’t designed to stay in the oven while food cooks, so check the manual.
- Leave-in probe thermometer: A probe on a heat-safe cable stays in a roast or a whole turkey while it cooks, with a display outside the oven, and many models have an alarm. It suits large cuts that cook for a long time.
- Dial instant-read: An analog thermometer with a round face. These generally need to be inserted deeper than digital models, often around 2 inches, and they respond more slowly, but many can be recalibrated with a small nut under the dial.
Whichever type you choose, look for a thin tip that can reach the center of thinner foods, a display that’s easy to read, and a temperature range that suits how you cook. Accuracy matters more than extra features.
How to take a temperature
- Start with a clean probe. Wipe or wash it if it was used on raw food earlier.
- Find the thickest part. The center of the thickest part of the food is usually the last place to reach temperature.
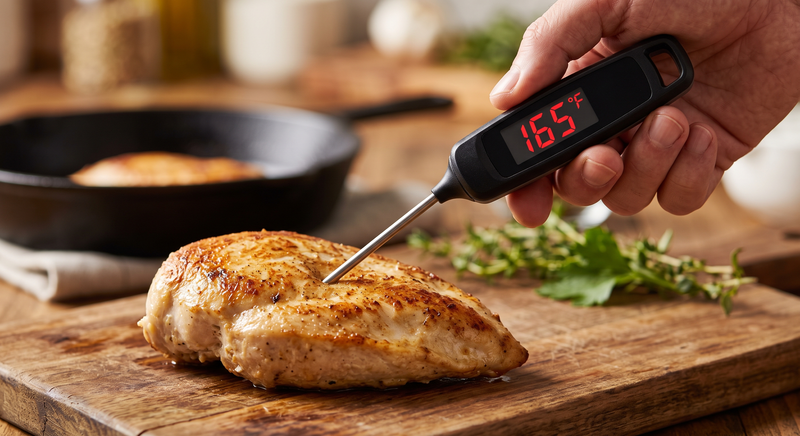
- Insert the tip so it’s centered. Keep it away from bone, gristle, thick fat, and the bottom of the pan. Bone conducts heat differently and can give a false reading. Digital tip sensors usually need to be inserted about ½ inch, but check your manufacturer’s instructions.
- Go in from the side for thin foods. For burgers, cutlets, and fish fillets, slide the probe in horizontally so the tip reaches the center.
- Wait for the number to settle. A digital display may rise for a few seconds before it holds steady.
- Check more than one spot when it matters. For large or uneven pieces, take readings in two or three places and go by the lowest one.
Special cases: For a whole chicken or turkey, check the thickest part of the thigh and the breast without touching bone. For soups, stews, and casseroles, stir first, then measure in the center with the tip clear of the bottom of the pot.
How to check that it’s accurate
A thermometer that’s a few degrees off can lead you to the wrong conclusion, so it’s worth checking occasionally, and after you’ve dropped it. The ice-water test is the simplest.
- Fill a glass with ice, then add cold water until the glass is full.
- Stir and wait about 3 minutes.
- Put the probe in the middle of the glass without touching the sides or bottom.
- It should read 32°F (0°C).
Boiling water is another reference point. It boils at about 212°F (100°C) at sea level, and the boiling point drops by roughly 1°F for every 500 feet of elevation, so the ice-water test is simpler if you live at altitude. If your thermometer is off by a small amount and has a calibration adjustment, use it. If it can’t be adjusted, note the difference, or replace it if it’s badly off or unstable.
Safe minimum internal temperatures
These figures follow the USDA’s safe minimum internal temperature guidance. Cooks often take some foods higher for texture, such as chicken thighs or slow-cooked pork, but they shouldn’t go lower.
| Food | Minimum internal temperature |
|---|---|
| Chicken, turkey, and other poultry (whole, parts, and ground) | 165°F (74°C) |
| Ground beef, pork, veal, and lamb; sausage | 160°F (71°C) |
| Beef, pork, veal, and lamb steaks, chops, and roasts | 145°F (63°C), then rest for at least 3 minutes |
| Fish and shellfish | 145°F (63°C) |
| Egg dishes | 160°F (71°C) |
| Casseroles and reheated leftovers | 165°F (74°C) |
Beyond meat
A thermometer is useful outside of meat cookery as well. It can confirm that reheated leftovers are hot all the way through. Bakers use it to check bread, and many bread recipes suggest an internal temperature somewhere in the range of 190–210°F (88–99°C), depending on the loaf, so follow your recipe. One caution: many instant-read thermometers aren’t rated for the temperatures of frying oil or sugar syrups, so check the maximum temperature in the manual before using one for those.
Care and cleaning
Wash the probe with hot, soapy water after each use, particularly when you move between raw and cooked food, so you don’t spread bacteria. Don’t submerge the whole unit unless it’s rated waterproof. Store it with its cover on, and replace the battery when the display looks dim or the readings become erratic.
Troubleshooting
- The reading keeps changing: It probably hasn’t settled yet, or the tip is touching the pan or moving. Hold it still for a few seconds.
- The reading is much higher than expected: The tip may be touching bone or the pan. Reposition it in the center of the thickest part.
- Different spots give different readings: This is normal, especially in large or uneven cuts. Use the lowest reading.
- The reading seems wrong overall: Do the ice-water test and check the battery.
- The dial is slow or unclear: Insert it deeper, since the sensing area is longer than on a digital tip, or consider switching to a digital model.
FAQ
Can I leave an instant-read thermometer in the oven?
Usually not. Most are designed for quick checks, not continuous heat, so use a leave-in probe thermometer for long roasts, unless the manual says your model is oven-safe.
Do I need to check every piece?
When you’re cooking a batch of chicken pieces or burgers, check the thickest pieces, plus a few others if they vary in size.
Is a cheaper thermometer good enough?
It can be, as long as it’s accurate. Test it in ice water when you buy it, and again from time to time.
Conclusion
An instant-read thermometer takes seconds to use and removes much of the uncertainty from cooking. Put the tip in the center of the thickest part, wait for a steady reading, and compare it with the safe minimum temperature for that food. Check its accuracy occasionally, keep it clean, and you’ll have a reliable guide for everything from chicken breasts to reheated casseroles.