By Harry Cruse | TasteSavory
Ask home cooks what changed their cooking the most, and the answers are rarely fancy. They’re not about special gadgets or secret ingredients. They’re small habits: getting ingredients ready first, leaving food alone in the pan, tasting as you go, letting meat rest. These habits work because they address the real reasons dinner goes wrong, which are timing, heat, seasoning, and guesswork. This guide collects ten of them, explains the reasoning behind each one, and shows how to start using them tonight. None of them depends on a particular recipe, so they improve everything you make.
The short answer
- Prepare everything before you start cooking, and clean as you go.
- Season in layers, and taste before you serve.
- Give food time in the pan to brown, and control the heat.
- Use a thermometer and a scale instead of guessing.
- Rest meat, save pasta water, and cook ahead when you can.
1. Get everything ready before you turn on the heat
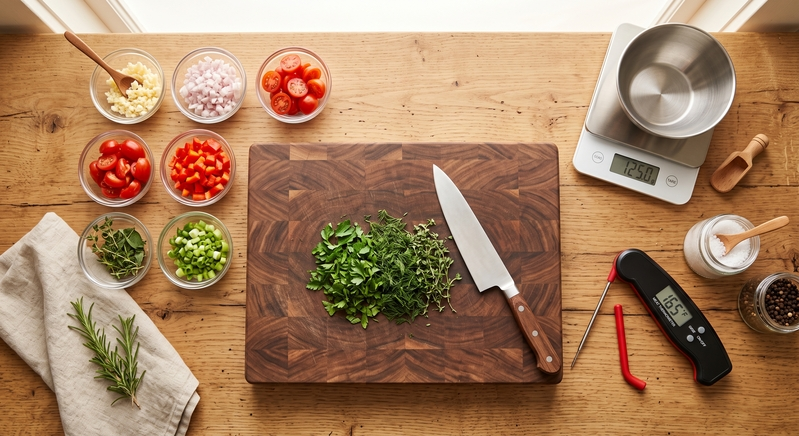
Professional cooks call this mise en place, which simply means “everything in its place.” Read the recipe all the way through, then chop, measure, and set out every ingredient before the pan gets hot. Cooking moves quickly once it starts, and garlic burns in the 30 seconds you spend hunting for the next ingredient. Keep a bowl on the counter for peels and trimmings to save trips to the bin. The same rule is even more important in baking, as we explain in our baking tips for beginners.
2. Keep your knife sharp and hold it properly
A sharp knife is safer than a dull one, because it cuts with less force and is less likely to slip. Learn the “claw” grip: curl the fingertips of your guiding hand inward, and let the flat of the blade rest against your knuckles as you cut. A honing steel straightens the edge between sharpenings, and a knife that’s truly dull needs to be sharpened. One good chef’s knife is enough for nearly everything, and better technique matters more than a larger set.
3. Season in layers and taste as you go
A pinch of salt early in cooking builds flavor all the way through a dish, while a final adjustment at the end fine-tunes it. Seasoning once at the table can’t do the same thing. Taste before you add anything, change one thing at a time, and taste again. If a dish is flat, it usually needs salt first, then acid such as lemon juice or vinegar. Our guide to flavor and color in cooking has a simple chart for fixing a dish that tastes off. A note of nuance: for some foods, such as mushrooms, cooks salt late so the pan stays dry long enough for them to brown, so it helps to know why you’re salting, not just when.
4. Let food sit in the pan
Brown food tastes better, and browning needs contact. When you stir or flip constantly, the food never stays against the hot surface long enough to develop a crust. Dry the surface, preheat the pan, add the food with space around it, and leave it alone. Meat is ready to turn when it releases from the pan on its own. Stirring “frequently” isn’t the same as stirring constantly. Two variations are worth knowing. For chicken thighs, start skin-side down in a dry pan over medium heat, which lets the fat render slowly and the skin crisp. Cook them to at least 165°F (74°C). For lean chicken breast, see our guide to keeping chicken breast juicy.
5. Control the heat, not just the flame
Many cooks treat the burner as the only tool, but the oven offers steady, even heat that’s easier to control. Searing a steak on the stove and finishing it in a hot oven, for instance, cooks a thick cut through without burning the outside, and a low oven keeps finished dishes warm while you finish others. Also match the pan to the job. Stainless steel and cast iron build the brown bits that become pan sauces, but they need a proper preheat and enough oil. Nonstick pans suit eggs and delicate fish, and manufacturers generally advise against heating them empty on high. Our guide to ways to cook meat shows which method suits each cut.
6. Cook to temperature, not to the clock
Recipe times are estimates. Ovens run hot or cool, and no two pieces of meat are the same thickness. An instant-read thermometer takes the guesswork out of meat, fish, leftovers, and even bread and cakes. Put the tip into the center of the thickest part and wait for the reading to settle. Our guide to using an instant-read thermometer covers placement, calibration, and safe minimum temperatures.
7. Let cooked meat rest
When meat comes off the heat, the juices are still moving toward the surface. Slicing right away sends them onto the board. Let steaks and chops rest for about 5 minutes, and large roasts for 10–20 minutes, before cutting. The temperature also keeps rising slightly as it rests, so take meat off the heat a few degrees below your target. The wait is especially worthwhile for a holiday roast or brisket, which is a good reason to build resting time into your plan, as in our holiday meal ideas.
8. Weigh your baking ingredients
A cup of flour can vary a great deal depending on how it’s scooped, and too much flour is the most common cause of dry, dense baked goods. A kitchen scale removes the problem. If a recipe lists grams, use them, and keep volume measures for small amounts such as teaspoons of baking powder. A scale also means fewer dishes, since you can weigh everything into one bowl.
9. Use your pasta water
Pasta water is salted and full of starch, which makes it a useful sauce ingredient. Salt the water generously, since pasta cooked in bland water tastes flat whatever sauce goes on it. A common starting point is about 1 tablespoon of fine salt for 4 quarts of water and a pound of pasta, and you can adjust from there. Don’t add oil to the pot. Before draining, scoop out a cup of the water, and use splashes of it to loosen a sauce and help it cling to the noodles. The same starch is what thickens our one-pot garlic Parmesan pasta.
10. Cook once, use it twice
The cooks who seem effortlessly organized usually have building blocks waiting in the freezer: stock, tomato sauce, cooked soups, and caramelized onions. Caramelizing onions takes a long time, so make a big batch and freeze it in portions. Some cooks speed up the process by softening the onions briefly in the microwave or by freezing them first, which breaks down their structure so they release water sooner. These are shortcuts rather than tested methods, so try them on a small batch. Wrap freezer food airtight and label it with the date, following the tips in our guide to storing food in the kitchen, and see our meal prep guide for a simple system.
A useful trick for thin sauces
If a sauce or stew needs thickening at the last minute, knead equal parts soft butter and flour into a paste, which French cooks call beurre manié. Whisk in small pieces, a little at a time, and simmer for a minute or two so the flour loses its raw taste. Stop adding when the sauce coats a spoon. It thickens more smoothly than sprinkling flour straight into a hot sauce, which tends to clump.
Common mistakes
- Crowding the pan: Food steams instead of browning. Cook in batches.
- Cooking with a cold pan: Food sticks and turns gray. Preheat first, except when a recipe says otherwise.
- Flipping or moving food too soon: It sticks and tears. Wait until it releases.
- Seasoning only at the end: The food tastes seasoned on the surface and flat inside.
- Skipping the rest: Juices run out and the meat dries.
- Trusting color instead of temperature: Food can look done and still be undercooked, or brown and overcooked.
FAQ
Which habit should I start with?
Preparing everything before you cook. It costs nothing and makes every other habit easier, because you can pay attention to the pan instead of the chopping board.
Do I need expensive pans or knives?
No. A single sharp chef’s knife and one or two sturdy pans go a long way. Technique matters more than equipment.
How do I learn to season by taste?
Practice on a simple dish such as soup. Taste it plain, add a small pinch of salt, taste again, and then add a few drops of lemon juice. The differences teach you what each change does.
Is it worth learning techniques instead of recipes?
Yes. Once you understand why searing, resting, and salting work, you can cook almost anything without a recipe in front of you.
Conclusion
Better cooking comes from habits, not gadgets. Prepare first, season in stages, let food brown, measure with a thermometer and a scale, and give meat time to rest. You don’t need to adopt all ten at once. Pick the one that solves your most common problem, use it for a week, and add another. Soon these steps will feel automatic, and everything you cook will improve.