By Harry Cruse | TasteSavory
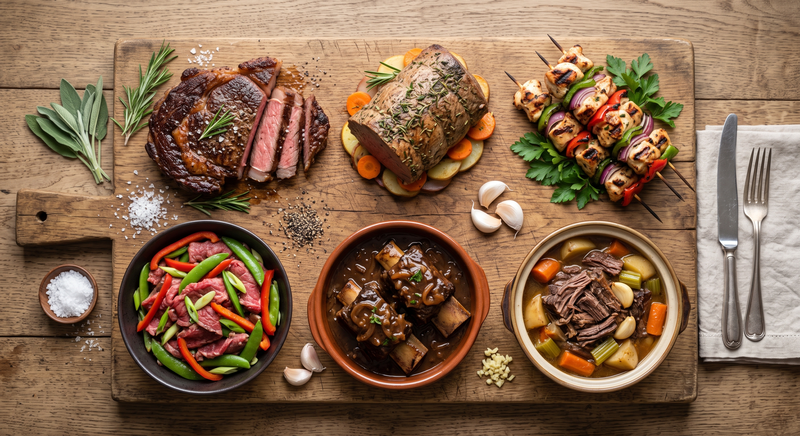
Most tough, dry, or disappointing meat isn’t a bad piece of meat. It’s the wrong cooking method for that cut. A steak cooked for three hours turns to leather, while a chuck roast seared for four minutes stays chewy no matter how carefully you watch it. This guide explains how the cut decides the method, then walks through six ways to cook beef, pork, and lamb: pan-searing, roasting, grilling or broiling, stir-frying, braising, and slow cooking. It ends with a basic pot roast recipe that shows the slow method in full. Chicken and other poultry are covered in our guide to keeping chicken breast juicy.
Start with the cut, not the recipe
Muscles that do little work, such as the loin and rib areas, are naturally tender and need only a short time over high heat. Muscles that work hard, such as the shoulder, leg, and chest, are full of connective tissue. That tissue makes the meat tough when cooked quickly, but when it’s held at a low, steady temperature with moisture for a long time, it breaks down into gelatin, which makes the meat tender and gives the sauce body. So the question isn’t which method is best in general. It’s which method suits the cut in front of you.
| Type of cut | Examples | Best methods |
|---|---|---|
| Tender, lean or well-marbled | Ribeye, strip steak, tenderloin, pork chops, pork tenderloin, lamb chops | Pan-searing, grilling, broiling, roasting (for larger pieces) |
| Thin, flavorful, chewy if mishandled | Flank steak, skirt steak, sirloin, pork loin strips | Stir-frying or quick grilling, sliced thinly against the grain |
| Tough, rich in connective tissue | Chuck roast, brisket, short ribs, pork shoulder, lamb shoulder, shanks | Braising or slow cooking |
| Ground | Ground beef, pork, lamb | Pan-cooking, grilling (burgers), simmering (chili, sauces) |
A note on doneness and safety
The USDA’s safe minimum internal temperature for whole cuts of beef, pork, and lamb is 145°F (63°C), followed by a rest of at least 3 minutes. Ground meat should reach 160°F (71°C). The only reliable way to check is an instant-read thermometer. Some people cook steaks below 145°F for a rarer texture, which is a personal choice with somewhat higher risk, and it isn’t recommended for young children, pregnant women, older adults, or anyone with a weakened immune system. Pork cooked to 145°F can still look slightly pink, and that’s normal.
Method 1: Pan-searing
Best for: steaks, pork chops, burgers, lamb chops.
Pat the meat very dry and season it with salt, ideally at least 30 minutes ahead, or up to a day in the refrigerator, uncovered. Heat a heavy skillet over medium-high until it’s properly hot, add a little oil with a high smoke point, and lay in the meat with space around each piece. Leave it alone for the first few minutes, until a deep brown crust forms and the meat releases from the pan. Flip once, or occasionally if you prefer, and cook until the thickest part reaches the target temperature. For steaks and chops about ¾–1 inch thick, expect roughly 4–6 minutes per side, but go by the thermometer. Wet surfaces and crowded pans are the main reasons for gray, steamed meat, as we explain in flavor and color in cooking. Finish with a spoonful of butter and a few herbs, and rest the meat for about 5 minutes.
Method 2: Oven roasting
Best for: pork loin, pork tenderloin, beef roasts from tender cuts, leg of lamb, bone-in roasts.
Roasting uses dry oven heat to cook larger pieces evenly. Smaller, tender cuts such as pork tenderloin do well at 400–450°F (200–230°C) for a short time, while larger roasts usually cook more evenly at 325–375°F (165–190°C). Searing first in a pan adds a deeper crust, and you can roast directly in the same skillet if it’s oven-safe. Time per pound is only a rough guide, because shape, starting temperature, and oven accuracy all matter, so insert a thermometer into the thickest part, away from bone. Take the roast out when it’s a few degrees below your target, since the temperature keeps rising as it rests. Let roasts rest for 10–20 minutes before slicing. Our holiday meal ideas include menu templates built around roasts and glazed ham.
Method 3: Grilling and broiling
Best for: burgers, sausages, steaks, chops, kebabs, ribs.
Both methods cook with intense heat from one direction. For grilling, set up two zones: a hot side for searing and a cooler side to finish thicker cuts without burning the outside. Thin pieces can cook over direct heat the whole time, while thick chops and bone-in cuts often need both zones. Keep the grill clean, since grease causes flare-ups, and follow the fire and gas precautions in our outdoor kitchen guide. To broil, set an oven rack about 4–6 inches from the element, use a broiler-safe pan, and start checking after 3–4 minutes per side, because broilers vary widely. Check your oven’s manual about whether the door should be open or closed. Burgers and other ground meat need to reach 160°F (71°C).
Method 4: Stir-frying
Best for: flank steak, sirloin, skirt steak, pork loin, thin-sliced meat.
Stir-frying turns chewier cuts into tender bites through slicing rather than slow cooking. Freeze the meat for 20–30 minutes to make it firm, then slice it about ¼ inch thick across the visible muscle fibers, not along them. Shorter fibers are much more tender. Heat a wok or large skillet until very hot, cook the meat in small batches so it browns instead of steaming, and remove it when it’s just browned, which takes only 1–2 minutes. Add it back at the end with the sauce and vegetables. The meat should be fully cooked, with no raw pink in the center of any piece.
Method 5: Braising
Best for: chuck roast, brisket, short ribs, pork shoulder, lamb shanks.
Braising combines a browned crust with a long, gentle simmer in a covered pot. Sear the meat first, cook vegetables and aromatics in the same pot, then add liquid, usually until it comes about halfway up the meat. Cover and cook in a low oven, around 300–325°F (150–165°C), until a fork slides in and twists with almost no resistance. For a 3-pound chuck roast, expect about 2½–3½ hours. Here’s the part that surprises people: if braised meat is still tough, it almost always needs more time, not less. Braised meat ends up far above the safe minimum temperature, and pulled-style cuts such as pork shoulder are often tender somewhere around 195–205°F (90–96°C), but rely on fork-tenderness rather than a number.
Method 6: Slow cooker
Best for: the same tough cuts as braising, with less hands-on work.
A slow cooker gives a similar result with very little attention. Searing the meat first is optional but improves flavor considerably. Because the lid traps moisture, you need less liquid than in the oven, often only about ½–1 cup for a roast, and the meat shouldn’t be submerged. A 3-pound chuck roast usually takes about 8–10 hours on low, but cookers vary, so check for fork-tenderness. Keep the lid closed as much as possible, and thaw meat completely before it goes in. The same idea works on a smaller scale in our easy beef chili, which simmers ground beef until the flavors come together.
Basic braised pot roast
This is a base recipe for method 5. Once you’ve made it, the same steps work for short ribs or pork shoulder with small adjustments in time.
Ingredients
Serves 6
- 1 boneless beef chuck roast (about 3 pounds / 1.4 kg)
- 2 teaspoons fine salt, plus more to taste
- ½ teaspoon black pepper
- 2 tablespoons neutral oil
- 1 large onion, sliced
- 4 cloves garlic, smashed
- 2 tablespoons tomato paste
- ½ cup (120 ml) dry red wine, or additional broth
- 2 cups (480 ml) low-sodium beef broth
- 2 sprigs fresh thyme, or ½ teaspoon dried
- 1 bay leaf
- 4 carrots, cut into 2-inch chunks
- 1 pound (450 g) small potatoes, halved (optional)
Instructions
- Salt ahead. Pat the roast dry and season all over with the salt and pepper. If you have time, refrigerate it uncovered for a few hours or overnight.
- Sear. Heat the oven to 300°F (150°C). Heat the oil in a 5–6 quart Dutch oven over medium-high heat. Sear the roast for 4–5 minutes per side, until deeply browned, then transfer it to a plate.
- Build the sauce. Lower the heat to medium. Cook the onion for 5 minutes, then add the garlic and tomato paste and stir for 1–2 minutes, until the paste darkens slightly. Add the wine, scrape up the browned bits from the bottom of the pot, and simmer for 2 minutes. Add the broth, thyme, and bay leaf.
- Braise. Return the roast to the pot. The liquid should come about halfway up its sides. Cover and cook in the oven for 1½ hours, then turn the roast over and add the carrots and potatoes around it.
- Finish. Cover and cook for 1–1½ hours more, until a fork slides easily into the meat and the vegetables are tender. Rest the roast in the pot for 15 minutes. Skim excess fat from the surface, and discard the thyme stems and bay leaf.
- Serve. Shred or slice the meat, and spoon the sauce and vegetables over it. If the sauce is thin, simmer it on the stove for 5–10 minutes.
Leftovers: Refrigerate within 2 hours and use within 3–4 days, or freeze for up to about 3 months. Reheat to 165°F (74°C). Keeping the meat in its sauce helps prevent it from drying out. See our meal prep guide for storage basics.
Troubleshooting
- Tough meat from a quick method: A tough cut was cooked too fast, or a tender cut was cooked too long. Match the cut to the method using the table above.
- Tough braised or slow-cooked meat: It needs more time. Cover it again and keep cooking, checking every 20–30 minutes.
- Gray, pale crust: The surface was wet, the pan wasn’t hot enough, or the pan was crowded. Dry the meat, preheat the pan, and cook in batches.
- Dry steak or chop: It was overcooked, or sliced before resting. Take it off the heat a few degrees early, rest it, and slice against the grain.
- Greasy sauce: Skim the surface with a spoon, or refrigerate the sauce so the fat hardens and can be lifted off.
- Stringy stir-fry beef: The slices were cut along the grain, or cooked too long. Slice across the fibers, and cook in short bursts.
FAQ
Should meat come to room temperature before cooking?
A short rest of up to about 30 minutes is common practice, but it isn’t essential. Never leave raw meat out for more than 2 hours.
Do I have to sear meat before braising?
No, but browning adds a lot of flavor and color that simmering alone won’t produce.
Can I cook meat from frozen?
It’s safe according to the USDA, but it takes about 50% longer and gives less even results. Thawing in the refrigerator first is better, especially for searing. Large roasts should be fully thawed before going in a slow cooker.
Why slice against the grain?
Cutting across the muscle fibers makes them shorter, so each bite needs less chewing. It matters most for flank, skirt, and brisket.
Conclusion
Good meat cookery comes down to one decision: is this cut tender enough for fast, hot cooking, or does it need time and moisture? Use a thermometer for the quick methods, use fork-tenderness for the slow ones, and rest the meat before you cut it. Start with the pot roast to see how a tough cut changes, then try searing a pork chop or stir-frying sliced flank steak to compare.