
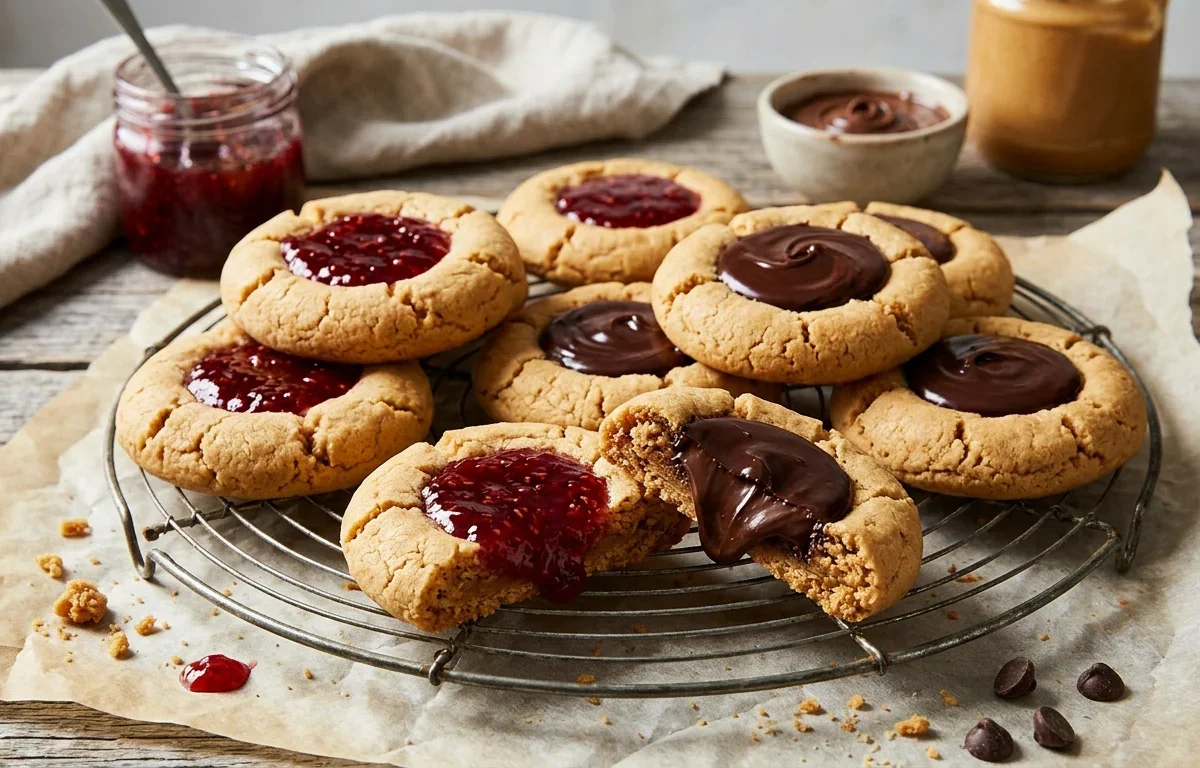
If you love the classic combination of peanut butter with fruit jam or chocolate, these stuffed peanut butter cookies are about to become your new favorite bake. They feature a rich, flourless-style peanut butter dough that bakes up tender, with a sweet hidden pocket of jam or chocolate waiting inside. Best of all, they come together quickly with basic pantry staples and require no complicated chilling time.
Why You'll Love This Recipe
- Features a dual-filling option so you can choose between sweet fruit jam or rich chocolate.
- Comes together in just 15 minutes of prep time with no fancy equipment needed.
- Naturally flourless base keeps the peanut butter flavor front and center.
- Yields a tender, chewy texture that contrasts wonderfully with the gooey centers.
- Easily scalable if you want to make a larger batch for parties or bake sales.
Ingredients You'll Need (and Why)
creamy peanut butter: Conventional, shelf-stable peanut butter (like Jif or Skippy) contains stabilizers that keep the oils from separating, giving this dough the exact structure it needs to hold its shape without flour.
granulated sugar: Sweetens the dough while creating slightly crisp edges. You can substitute light brown sugar if you prefer a softer, chewer cookie.
large egg: Acts as the primary binder in this flourless dough, holding all the ingredients together as they bake.
baking soda: Provides just a tiny bit of lift so the cookies don't turn out overly dense or heavy.
How to Make It
Mixing the Flourless Dough
Because this recipe relies on peanut butter rather than wheat flour as the base, mixing is wonderfully simple. Whisking the peanut butter, sugar, egg, and flavorings together thoroughly ensures the egg is fully incorporated, which creates the structure that keeps the cookies from crumbling apart.
Shaping and Indenting
Rolling the dough into uniform balls ensures even baking. When pressing your thumb or a spoon into the center to create the pocket for the filling, don't worry if the edges crack slightly—peanut butter dough is naturally crumbly, and you can easily smooth any cracks back together with your fingertips.
Filling and Baking
Dividing your fillings between fruity preserves and rich chocolate gives you the best of both worlds. Keep an eye on the bake time; because there is no flour, you are simply looking for the edges to turn lightly golden and the cookie structure to set before pulling them from the oven.
Success Tips
- Use conventional, shelf-stable peanut butter rather than natural, oil-separating peanut butter to ensure the dough holds its shape properly.
- If your thumb sticks to the dough when making indentations, lightly dip your finger or the spoon in a little bit of granulated sugar or water.
- Don't overfill the thumbprint cavities, or the jam and chocolate may bubble over the edges during baking.
- Let the cookies cool completely on a wire rack if you want firmer centers, or enjoy them slightly warm when the chocolate and jam are deliciously gooey.
Variations
- Try swapping the fruit jam for a dollop of salted caramel in half of the cookies.
- Press a small peanut butter cup or chocolate kiss into the center immediately after the cookies come out of the oven instead of baking the filling.
Storage & Make-Ahead
Room temperature: Store the cookies in an airtight container at room temperature for up to 3 to 4 days.
Fridge: You can store them in an airtight container in the refrigerator for up to a week if your home is particularly warm.
Freezer: Freeze the baked and cooled cookies in a single layer or separated by parchment paper in a freezer-safe container for up to 2 months.
FAQ
Can I use natural peanut butter for this recipe?
It is best to use conventional, shelf-stable peanut butter (like Jif or Skippy). Natural peanut butter contains too much separated oil, which can cause the cookie dough to spread too thin and lose its shape in the oven.
Why did my cookies crack when I pressed the center?
Peanut butter dough is naturally prone to minor cracking because it lacks gluten. This is completely normal! Just use your fingers to gently press any cracked edges back together after making the indentation.
Do I need to let the cookies cool before eating?
Yes, let them rest on the baking sheet for 5 to 10 minutes before moving them. The centers are very hot and soft right out of the oven, and the resting time allows them to firm up properly.
Special Tools
Affiliate linksThe equipment that makes this recipe easier. Optional, but it helps.
As an Amazon Associate we earn from qualifying purchases. Links below are affiliate links, at no extra cost to you.