
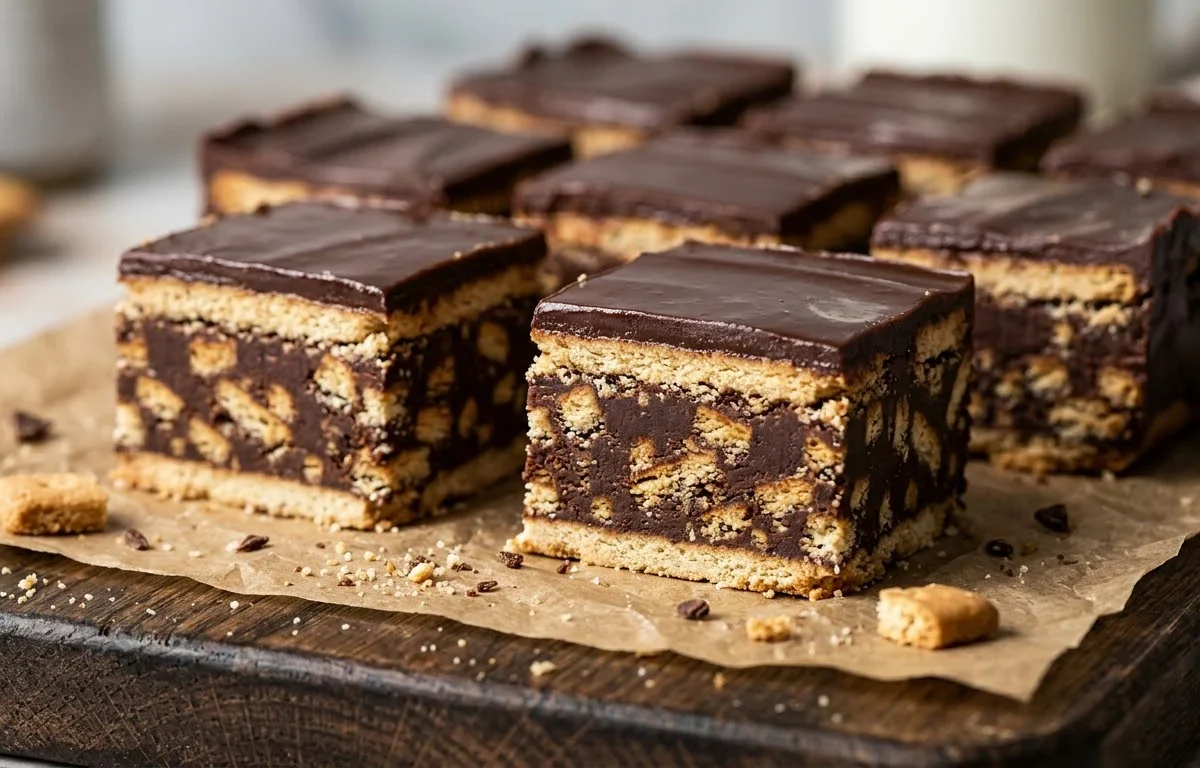
If you love chocolate and want an impressive dessert without turning on the oven, this no-bake chocolate biscuit mosaic cake is your answer. It layers crisp tea biscuits with a rich, velvety chocolate mixture and tops it all off with a glossy ganache. Best of all, the refrigerator does all the heavy lifting to turn simple ingredients into a stunning, sliceable masterpiece.
Why You'll Love This Recipe
- Zero oven time required—entirely assembled in your refrigerator.
- Gorgeous mosaic pattern appears when you slice into the cake.
- Uses simple, pantry-friendly ingredients like tea biscuits and chocolate.
- Can be made a full day in advance for stress-free entertaining.
- Features a dual texture of tender soaked cookies and snappy whole layers.
Ingredients You'll Need (and Why)
rectangular tea biscuits or Petit Beurre cookies: These dry, crisp cookies provide the structural integrity and signature mosaic look when sliced. They soften just enough in the fridge while keeping their distinct shape.
dark or semi-sweet chocolate: Chopping the chocolate into uniform pieces ensures it melts quickly and smoothly when combined with warm dairy without seizing.
heavy cream: High-fat dairy creates a rich, luxurious mouthfeel and helps the ganache and filling set up firmly as it chills.
butter: Adding a bit of butter to the chocolate base adds glossy sheen and helps the mixture solidify nicely as it cools.
How to Make It
Lining and Layering the Base
Starting with a parchment-lined pan is essential for a clean release later. Arranging the initial flat layer of whole biscuits creates a neat, structural bottom crust that makes slicing easier.
Building the Mosaic Filling
Breaking the remaining biscuits into rough pieces creates the 'mosaic' effect once cut. Pouring the warm, melted chocolate and cream mixture over them coats every piece, binding the chunks together into a cohesive, fudge-like middle layer.
Finishing with Ganache and Chilling
A smooth chocolate ganache seals the top of the cake, adding a decadent finish. Giving the cake ample time in the refrigerator lets the biscuits soften slightly while the chocolate elements firm up into sliceable squares.
Success Tips
- Make sure your parchment paper has plenty of overhang on the sides so you can easily lift the entire cake out of the pan once set.
- Don't crush the biscuits too finely; you want rough chunks to achieve the signature mosaic pattern when sliced.
- Ensure your warm cream is hot enough to fully melt the chopped chocolate for the ganache without needing extra heat.
- Allow the cake to chill for the full 3–4 hours, or ideally overnight, so the layers firm up completely for slicing.
Storage & Make-Ahead
Fridge: Store tightly covered or in an airtight container in the refrigerator for up to 4 days.
Freezer: Can be frozen for up to 1 month. Thaw overnight in the refrigerator before slicing and serving.
FAQ
Can I use milk chocolate instead of dark or semi-sweet?
Yes, but keep in mind that milk chocolate has more sugar and less cocoa solids, which will make the final dessert noticeably sweeter and softer.
What kind of biscuits should I use if I can't find tea biscuits?
Petit Beurre cookies are the best substitute. You can also use plain digestive biscuits or Marie biscuits as long as they are rectangular or easily arranged.
Why do I need to refrigerate the cake for so long?
The refrigerator time is crucial because it allows the melted chocolate and butter to solidify, binding the biscuit layers together and letting the cookies soften to a cake-like texture.
Special Tools
Affiliate linksThe equipment that makes this recipe easier. Optional, but it helps.
As an Amazon Associate we earn from qualifying purchases. Links below are affiliate links, at no extra cost to you.