
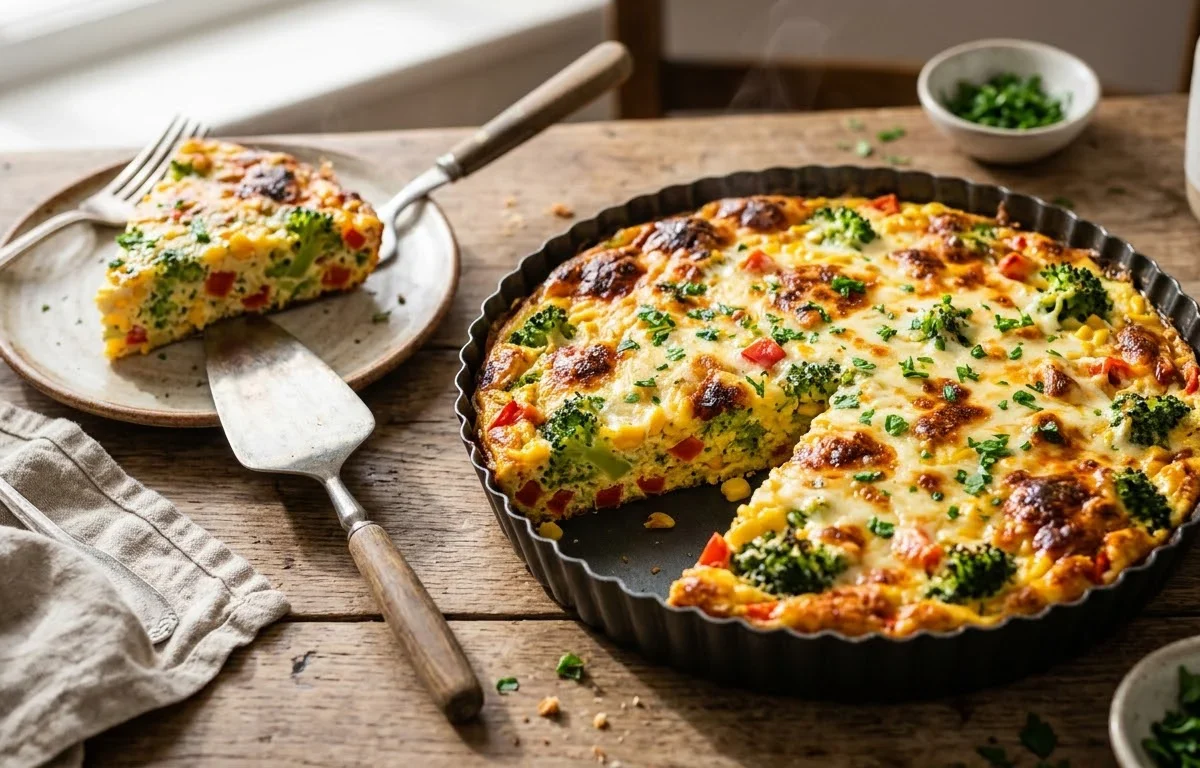
If you love the savory comfort of a traditional quiche but want to skip the fuss of making pastry dough, this crustless version is for you. Baked neatly in a tart pan, it features a clever pressed-broccoli base topped with colorful vegetables and plenty of melted cheese. It makes a wonderful breakfast, brunch, or light weeknight dinner.
Why You'll Love This Recipe
- Uses a unique pressed-broccoli layer instead of a heavy pastry crust for a lighter bite.
- Bakes beautifully in a standard tart pan or pie dish with minimal equipment.
- Combines the earthy flavor of broccoli with sweet corn and bright red bell pepper.
- Naturally gluten-free and easily adapted to whatever vegetables you have on hand.
- Slices cleanly into neat wedges for an impressive presentation.
Ingredients You'll Need (and Why)
Fresh broccoli florets: Blanching or steaming softens the broccoli so it can be pressed flat into a cohesive crust layer without woody stems getting in the way.
Sweet corn kernels: Adds bursts of natural sweetness that balance out the savory eggs and sharp cheese.
Red bell pepper: Provides a mild crunch and vibrant pop of color, making the finished slice look bakery-worthy.
Large eggs: Acts as the structural protein network that traps air and sets into a firm, sliceable custard when baked.
Milk or heavy cream: Introduces just enough fat and moisture to keep the baked eggs tender rather than rubbery.
How to Make It
Building the Vegetable Base
By blanching your broccoli first, you remove its raw bite and make the florets pliable. Using a small cup to press them firmly into the bottom of a greased tart pan creates a dense, vegetable-forward bed that mimics a traditional crust while keeping the dish light.
Layering the Fillings
Scattering the sweet corn and diced red bell pepper evenly ensures every single wedge gets a balanced mix of textures and flavors. A light seasoning directly on the vegetables helps build flavor from the inside out.
Pouring and Baking
Whisking the eggs and dairy thoroughly incorporates air, helping the quiche puff up slightly in the oven. Pouring the mixture gently over the vegetables allows it to fill all the gaps around the broccoli before a generous crown of cheese seals the deal.
Success Tips
- Make sure to thoroughly drain or pat dry your blanched broccoli so excess water doesn't water down your egg mixture.
- Whisk the eggs and milk vigorously until fully combined so you don't end up with pockets of plain egg white.
- Watch for the center to stop jiggling slightly to confirm the quiche is fully baked through.
- Use a greased tart pan with a removable bottom for the easiest slicing and serving presentation.
Variations
- Swap the mozzarella for sharp cheddar or Gruyère if you prefer a sharper, more pronounced cheese flavor.
- Add a handful of finely diced smoked turkey or cooked beef bacon along with the peppers for a meatier version.
Storage & Make-Ahead
Fridge: Store leftover slices in an airtight container in the refrigerator for up to 3 to 4 days. Reheat gently in the microwave or a toaster oven.
Freezer: Wrap individual baked slices tightly in plastic wrap and freeze for up to 1 month. Thaw overnight in the fridge before reheating.
FAQ
Can I use frozen broccoli instead of fresh?
Yes, just thaw it completely and squeeze out as much excess moisture as possible with a clean kitchen towel before pressing it into the pan.
Do I have to use a tart pan?
Not at all. A standard pie dish works wonderfully, though a tart pan gives you those lovely fluted edges.
Can I make this ahead of time?
You can prep the vegetables and whisk the egg mixture a few hours in advance, keeping them separate in the fridge until you are ready to assemble and bake.
Special Tools
Affiliate linksThe equipment that makes this recipe easier. Optional, but it helps.
As an Amazon Associate we earn from qualifying purchases. Links below are affiliate links, at no extra cost to you.