

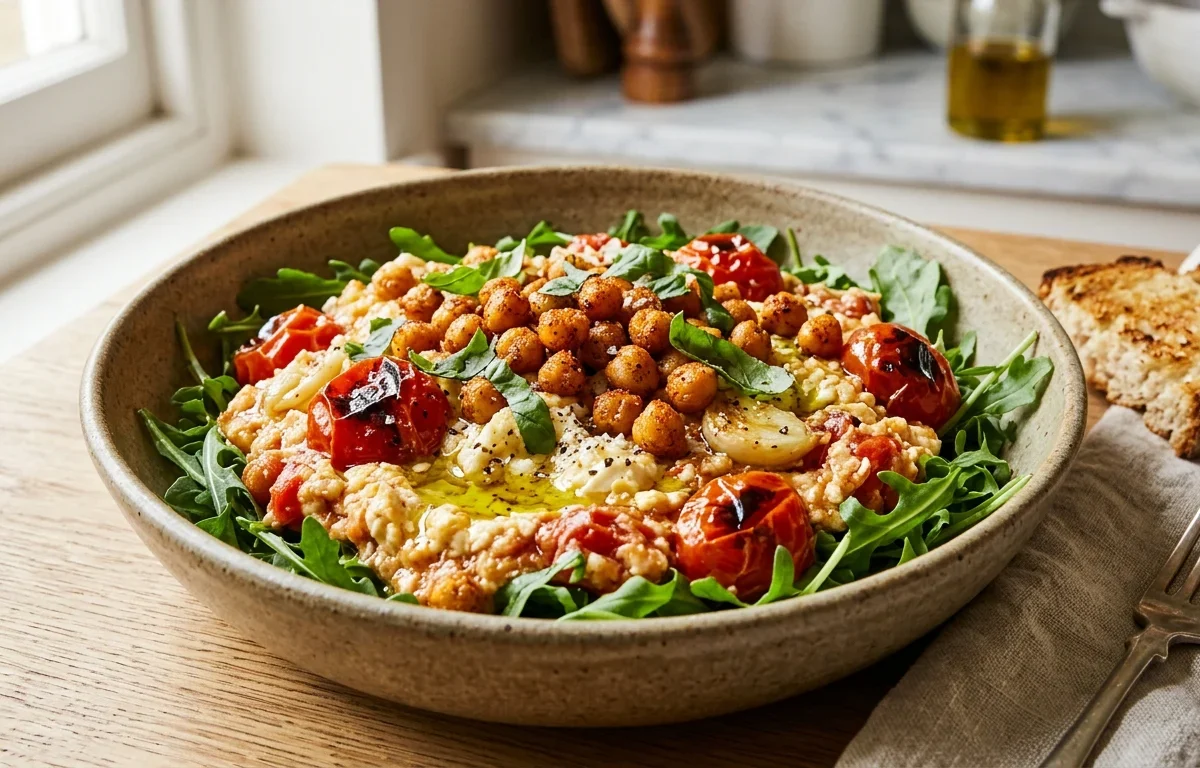
If you love creamy textures and bold Mediterranean flavors, this baked feta and crispy chickpea dip is about to become your new favorite go-to snack. Roasting blocks of cheese alongside fresh vegetables transforms them into a velvety spread that practically begs to be scooped up. Paired with spiced, crunchy chickpeas and fresh greens, it balances comfort food warmth with vibrant, whole-food freshness.
Why You'll Love This Recipe
- Combines a smooth, melted cheese base with a satisfyingly crunchy chickpea topping for great textural contrast.
- Comes together easily in under 30 minutes with simple, wholesome pantry ingredients.
- Serves wonderfully warm over a bed of fresh rocket for a built-in salad element.
- Works brilliantly as a party appetizer, a light lunch, or a cozy evening snack.
Ingredients You'll Need (and Why)
Feta cheese: A firm block of feta softens into a creamy, spreadable texture when baked without melting completely away like mozzarella.
Cherry tomatoes: As they bake, their natural juices release and burst, mingling with the olive oil and melting cheese to create a rich, tangy sauce.
Chickpeas: Draining, rinsing, and drying them thoroughly ensures they turn out crunchy rather than chewy when roasted.
Olive oil: Acts as the primary cooking medium that helps roast the vegetables, enrich the feta, and tie all the flavors together.
How to Make It
Baking the Feta and Tomato Base
The secret to a great baked dip is letting the tomatoes release their moisture slowly while the feta softens and browns at the edges. Tucked alongside onions and whole garlic cloves, the cheese absorbs sweet, savory flavors as everything roasts together.
Roasting the Chickpeas
While the cheese softens in the oven, seasoning the chickpeas with smoky paprika, chili powder, and salt gives them a wonderful savory crunch. Spreading them into a single layer on your baking tray ensures they roast evenly instead of steaming.
Combining and Serving
Mashing the warm, burst tomatoes and melted feta creates a rich, creamy base right in the baking dish. Pouring the crispy chickpeas over top adds a fantastic textural contrast, especially when spooned directly over fresh, peppery rocket leaves.
Success Tips
- Watch the feta during the last few minutes of baking to ensure it achieves a golden-brown top without burning.
- Spread the chickpeas in a single uncrowded layer on the baking tray so they crisp up nicely in the heat.
- Mash the tomatoes and feta while they are still piping hot so the ingredients blend together smoothly into a creamy dip.
Variations
- Swap fresh rocket for baby spinach if you prefer a milder green base for serving.
- Add a squeeze of fresh lemon juice over the finished dish for an extra pop of brightness.
Storage & Make-Ahead
Fridge: Store any leftovers in an airtight container in the refrigerator for up to 2 days. Reheat gently in the oven or microwave before serving.
FAQ
Can I use crumbled feta instead of a block?
A block works best for this recipe because it holds its shape while softening into a rich, creamy center rather than melting away instantly.
How do I make sure my chickpeas get crispy?
Dry the rinsed chickpeas thoroughly with a clean kitchen towel or paper towels before seasoning them, and make sure they aren't overcrowded on the baking tray.
What should I serve with this dip?
It is wonderful served warm over fresh rocket, but you can also scoop it up with crusty bread, pita triangles, or raw vegetable crudités.
Special Tools
Affiliate linksThe equipment that makes this recipe easier. Optional, but it helps.
As an Amazon Associate we earn from qualifying purchases. Links below are affiliate links, at no extra cost to you.