
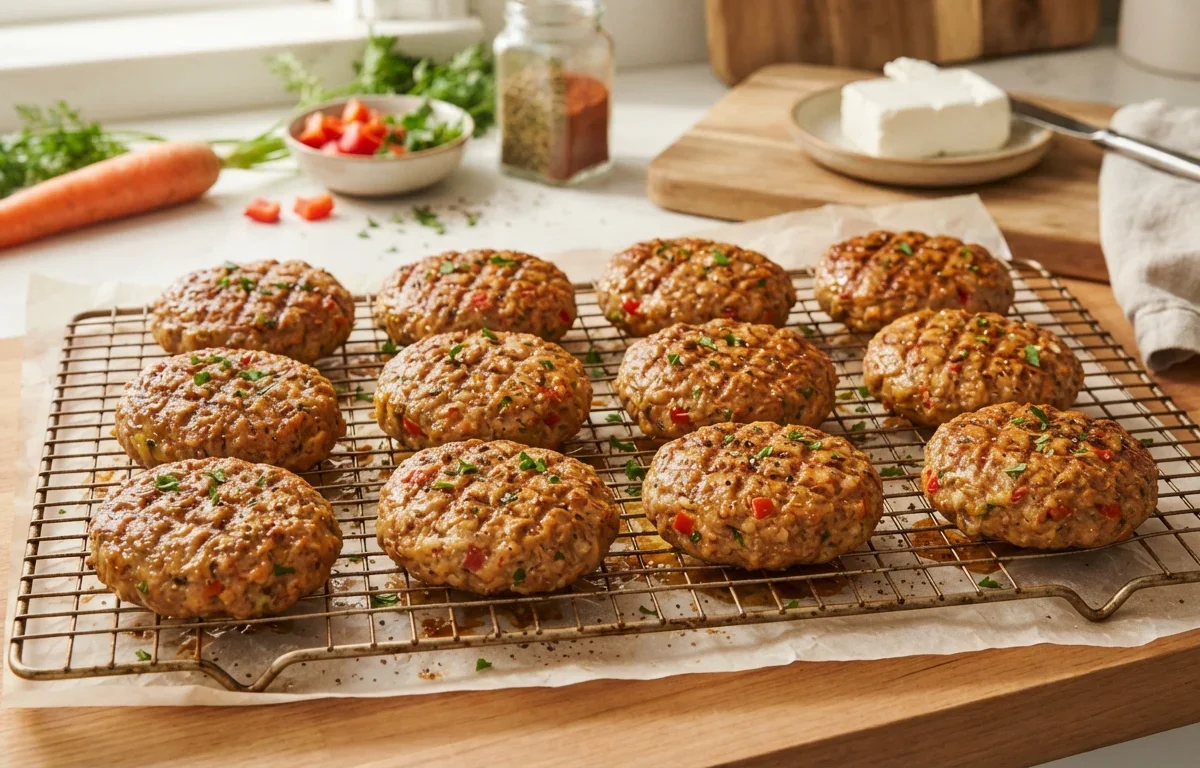
If you are looking for an easy way to elevate ordinary ground meat into something remarkably juicy and flavorful, these Veggie & Cream Cheese Meat Patties are your answer. By blending fresh vegetables and a whole tub of cream cheese directly into the meat, you lock in moisture while sneaking in extra texture and flavor. Plus, using an empty cream cheese tub as a mold makes shaping them completely foolproof.
Why You'll Love This Recipe
- Incorporates a full block of cream cheese directly into the meat mixture to guarantee ultimate moisture and rich flavor in every bite.
- Loaded with finely chopped and grated vegetables like red bell pepper, carrot, onion, and potato for added texture and savory depth.
- Clever shaping method uses a clean, empty cream cheese tub as an oval mold to easily cut out uniform, bakery-style patties.
- Simple baking method eliminates the stovetop mess of flipping fragile patties in a crowded skillet.
- Easily adapts to whatever ground meat you have on hand, whether it's beef, pork, or a savory blend of both.
Ingredients You'll Need (and Why)
Cream cheese: Acts as a powerful moisture binder, melting gently into the meat as it bakes to create an exceptionally tender texture.
Eggs: Provide the essential structural protein web needed to hold the meat, vegetables, and cheese together without falling apart in the oven.
Butter: Adds extra pockets of richness that melt during cooking, preventing lean ground meat from drying out.
Grated potato: Releases just enough starch to help bind the patty while adding a soft, comforting texture to the interior.
How to Make It
Building the Well and Adding Add-ins
Starting on a clean surface or in a roomy bowl allows you to spread out your ground meat and create a deep central well. This clever technique keeps your eggs, butter, and finely diced vegetables contained so you can gently fold the meat over them before getting your hands dirty, ensuring even distribution right from the start.
Incorporating the Cream Cheese
Placing the entire block of cream cheese right on top of the vegetable mixture before mixing is the secret to this recipe's success. As you work the meat by hand, the cream cheese breaks down into tiny pockets throughout the mixture, which melts during the baking process to keep the patties remarkably juicy.
Shaping and Stamping the Patties
Flattening your mixed meat into an even rectangular sheet makes portioning a breeze. Reusing your empty, cleaned cream cheese tub as a makeshift oval cookie cutter is a brilliant trick for getting uniform, thick patties that look professionally made and cook at the exact same rate.
Success Tips
- Make sure your vegetables are chopped or grated quite finely so they distribute evenly and don't create weak spots in the structure of the patties.
- Press the meat mixture down into a uniform thickness across your rectangular sheet to ensure every cut-out patty bakes evenly.
- Use parchment paper on your baking tray to prevent the cheesy, rich patties from sticking to the metal surface.
- Press the crisscross grid pattern firmly into the top of each patty with a spoon; this not only adds a lovely rustic look but helps steam escape evenly during baking.
Variations
- Swap out the parsley or dill for fresh chopped chives or cilantro depending on the flavor profile you want to achieve.
- Use ground turkey or chicken in place of the beef and pork blend for a lighter alternative.
Storage & Make-Ahead
Fridge: Store leftover baked patties in an airtight container in the refrigerator for up to 3 to 4 days. Reheat gently in a warm skillet or oven before serving.
Freezer: Freeze fully cooled baked patties in a single layer on a baking sheet before transferring them to a freezer-safe bag for up to 2 months.
FAQ
Can I use low-fat cream cheese for this recipe?
It is best to use standard full-fat cream cheese. The higher fat content is crucial for keeping the meat moist and preventing the patties from drying out in the oven.
Do I have to use an empty cream cheese tub to cut the patties?
Not at all! While the tub makes a fun and perfectly sized oval mold, you can easily shape the patties by hand into equal-sized rounds.
What kind of minced meat works best?
A blend of beef and pork provides the best balance of rich flavor and moisture, but you can use 100% ground beef or ground pork with great results.