
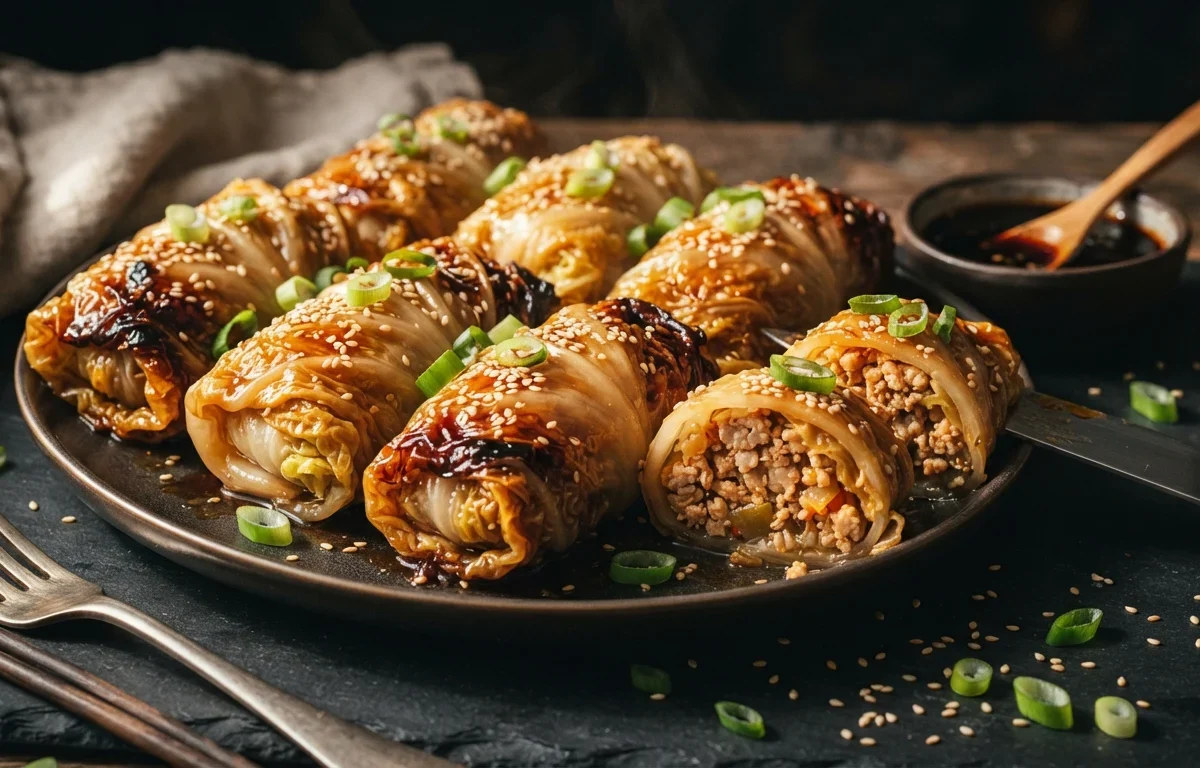
If you are looking for a fresh, cozy, and deeply flavorful dinner that steps away from the usual routine, these sweet-glazed Napa cabbage rolls are an absolute must-try. Tender Napa cabbage leaves wrap around a juicy, savory garlic chicken filling, all finished with a sticky, caramelized glaze that brings everything together. Don't worry if you've never rolled cabbage before—Napa cabbage is naturally flexible and very forgiving to work with.
Why You'll Love This Recipe
- Features a wonderful flavor contrast: sweet and sticky on the outside, savory and garlicky on the inside.
- Napa cabbage softens much faster and easier than traditional green cabbage, making rolling a breeze.
- The simple honey-soy glaze caramelizes beautifully in the oven for a gorgeous glossy finish.
- Uses everyday ground chicken and pantry staples to create an impressive-looking meal.
- Balances lean protein with tender vegetables for a comforting, satisfying dinner.
Ingredients You'll Need (and Why)
Napa cabbage: Its elongated, tender leaves bend easily without tearing compared to round head cabbages, making it the perfect vessel for rolling.
Ground chicken: Provides a lean, mild base that easily absorbs the strong garlic, ginger, and soy sauce seasonings in the filling.
Cooked jasmine rice: Acts as a binder that absorbs moisture from the chicken and egg while adding a pleasant, tender texture to the filling.
Honey: Forms the sticky foundation of the glaze, caramelizing under the heat to create a sweet, glossy exterior.
Egg: Coagulates during baking to keep the chicken filling cohesive and tender rather than crumbly.
How to Make It
Blanching the Cabbage
The secret to easy rolling is properly softening the leaves. Blanching them in boiling water for just a minute or two relaxes the stiff ribs so they bend without snapping. Plunging them into cold water stops the cooking immediately and sets that bright green color.
Mixing the Filling & Rolling
Mixing the chicken with rice, egg, and aromatics creates a juicy, well-seasoned meatball-like interior. When wrapping, tucking the sides inward like a burrito ensures the filling stays securely sealed inside as it bakes.
Glazing and Baking
Baking the rolls covered traps steam to ensure the chicken cooks through gently, while uncovering them for the final minutes lets the honey-soy glaze reduce into a sticky, caramelized coating.
Success Tips
- Pat the blanched cabbage leaves thoroughly dry with a paper towel before rolling so the filling doesn't slip around.
- Don't overfill the leaves; stick to about 2 tablespoons of filling to ensure the cabbage wraps neatly around it.
- Check the internal temperature of the chicken filling with a digital thermometer to ensure it reaches 165°F (74°C).
- Keep a close eye on the rolls if you choose to broil them at the end, as the honey in the glaze can burn quickly.
Storage & Make-Ahead
Fridge: Store leftover cabbage rolls in an airtight container in the refrigerator for up to 3 to 4 days. Reheat gently in the microwave or a covered skillet.
FAQ
Can I use standard green cabbage instead of Napa cabbage?
This recipe is specifically tailored for Napa cabbage, which has tender, oblong leaves that soften quickly. Standard green cabbage leaves are much thicker and tougher, requiring a significantly longer blanching time.
Do I have to cook the rice beforehand?
Yes, use already cooked jasmine rice for the filling. Raw rice will not cook properly inside the rolls and will absorb too much moisture.
How do I prevent the rolls from unrolling?
Always place them seam-side down in your baking dish. The weight of the roll combined with the baking process will naturally seal them shut.