
Roasting a whole chicken can feel intimidating, but this easy garlic butter recipe makes it approachable and foolproof. By combining a high initial oven temperature for crispy skin with a lower finishing temperature, you get juicy, tender meat every single time. It is an impressive Sunday dinner that requires minimal hands-on prep.
Why You'll Love This Recipe
- High initial roasting heat locks in natural juices while creating an irresistibly crispy golden skin.
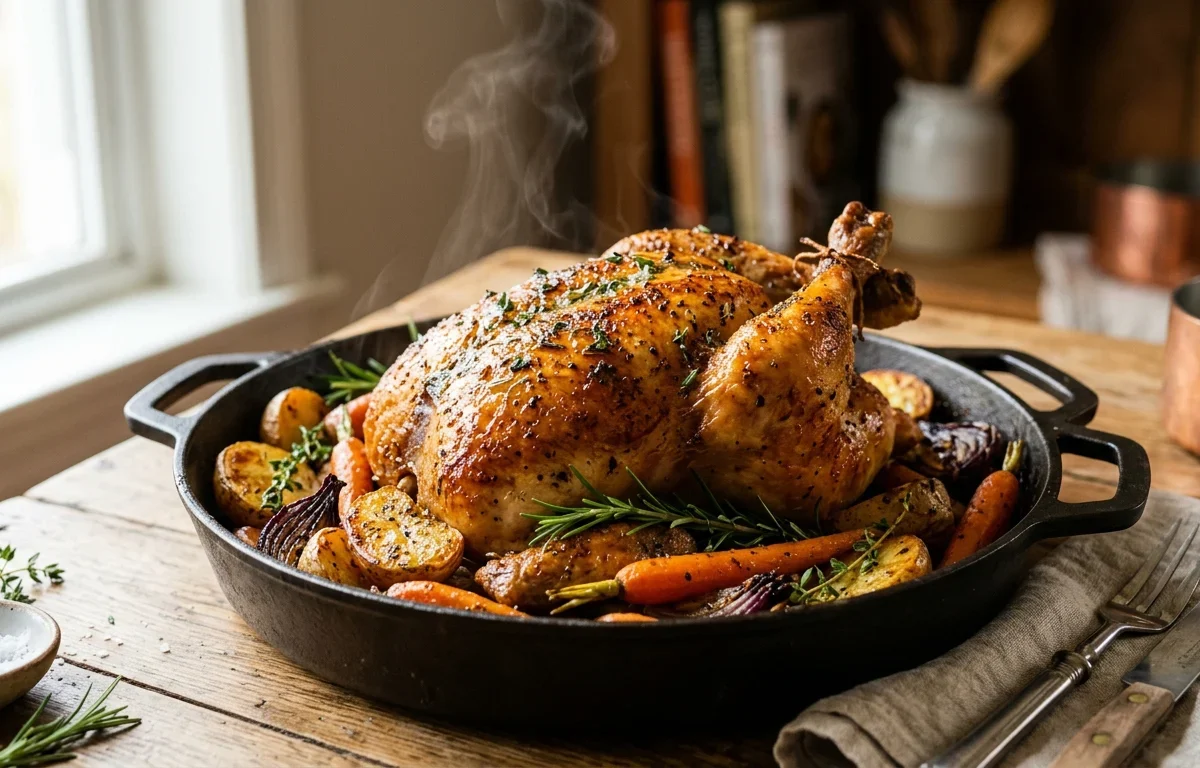
- Baking the chicken directly over seasoned carrots, potatoes, and onions infuses the vegetables with rich drippings.
- Spreading garlic butter directly under the breast meat keeps the leanest part of the bird exceptionally moist.
- Requires very little active prep time, leaving your oven to do the heavy lifting.
- Fills your kitchen with the comforting aromas of roasted garlic, lemon, and fresh herbs.
Ingredients You'll Need (and Why)
Whole Chicken: A 4 to 5-pound bird is the ideal size for even cooking, ensuring the breast meat stays juicy before the thighs are fully done.
Unsalted Butter: Softened butter acts as a vehicle for the herbs and spices while adding richness, helping the skin brown evenly.
Lemon: Placing lemon halves inside the cavity adds moisture and a subtle citrus steam from the inside out as it roasts.
Chicken Broth: Adding liquid to the bottom of the roasting pan prevents the root vegetables from burning and creates the base for natural pan juices.
Paprika: Paprika helps achieve that classic, deep golden-brown skin color without burning too quickly.
How to Make It
Prep and Seasoning
Taking the chill off the meat helps it roast evenly, and getting the skin completely dry is the absolute key to crispiness because moisture creates steam, which makes skin rubbery instead of crisp. Loosening the skin allows you to season the meat directly rather than just flavoring the exterior.
The Roasting Strategy
Starting the bird at a high heat of 425°F kicks off the browning process and gets the skin rendering nicely. Lowering the heat after 20 minutes protects the delicate breast meat from drying out while letting the interior and thighs cook through gently.
Resting and Juices
Resisting the urge to carve immediately is crucial. Resting allows the internal juices, which were driven outward by the heat, to redistribute evenly throughout the meat so every slice stays remarkably tender.
Success Tips
- Always use a digital meat thermometer inserted into the thickest part of the thigh without touching bone to confirm doneness at 165°F.
- Do not skip drying the skin with paper towels; surface moisture is the enemy of crispiness.
- Letting the chicken rest for 15 to 20 minutes before carving ensures the juices stay inside the meat rather than running out onto your cutting board.
- If the skin starts browning too quickly near the end of cooking, loosely tent a piece of foil over the top of the chicken.
Storage & Make-Ahead
Fridge: Store leftover roasted chicken in an airtight container for up to 3 to 4 days.
Freezer: Shred or cube the cooked chicken meat and freeze in an airtight bag or container for up to 3 months.
FAQ
Should I truss the chicken legs together?
Trussing with kitchen twine helps the chicken cook more uniformly and look neat, but it is optional. If you don't truss, simply tuck the wing tips under so they don't burn.
Can I use chicken parts instead of a whole chicken?
Yes, you can use bone-in, skin-on chicken thighs and breasts, though you will need to adjust the roasting time downward since smaller cuts cook much faster.
Why do I need to start the oven at a high temperature?
Starting at 425°F gives the skin a head start on rendering fat and turning golden and crispy before reducing the heat to gently finish cooking the interior.