
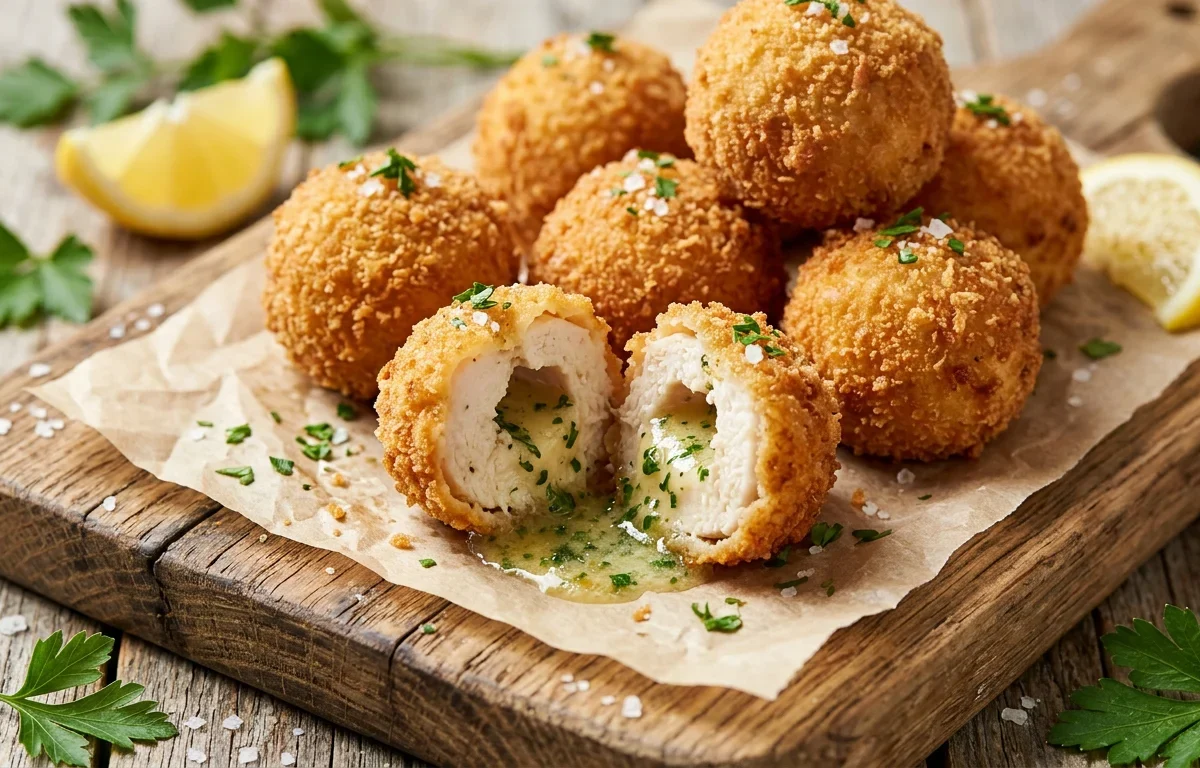
If you love traditional Chicken Kiev but want something a bit more fun and bite-sized, these crispy stuffed chicken kiev balls are for you. Wrapped around a core of frozen garlic herb butter, ground chicken forms a tight seal that keeps all that rich flavor trapped inside until the very first bite. It is a rewarding kitchen project that transforms simple ingredients into an absolute crowd-pleaser.
Why You'll Love This Recipe
- Features a molten, rich garlic herb butter center that bursts with flavor when you bite into it.
- Uses ground chicken instead of whole breasts, making it much easier to shape and wrap evenly.
- The panko and Parmesan breading creates an ultra-crunchy crust that holds up beautifully during frying.
- Makes a fantastic finger-food appetizer or a fun weeknight dinner paired with mashed potatoes or a salad.
Ingredients You'll Need (and Why)
Unsalted butter: Using unsalted butter allows you to control the exact amount of sodium in the herb filling.
Ground chicken: Ground chicken makes it very easy to mold and seal around the butter core without worrying about pounding chicken cutlets.
Panko breadcrumbs: Panko creates a lighter, crunchier exterior than traditional breadcrumbs because of its flaky texture.
Parmesan cheese: Grated Parmesan adds a savory, umami note to the breadcrumb coating and helps promote a deep golden color when fried.
How to Make It
Preparing the Butter Core
The secret to a great Chicken Kiev is keeping the butter inside the meat until it hits the table. By mixing the herbs and garlic into softened butter and freezing it into a solid log, you create manageable cubes that won't instantly melt away when they touch the warm chicken or the hot oil.
Wrapping and Sealing
Working with seasoned ground chicken makes it much easier to mold portions around the frozen butter cubes. Take your time sealing the edges completely so there are no cracks or gaps, which prevents the melted butter from leaking out into your frying oil.
The Breading and Frying Process
A classic three-step breading station—flour, egg, and panko—creates a protective barrier around the chicken. Frying at a steady 350°F ensures the exterior gets deeply golden and crispy while the ground chicken cooks through safely to 165°F.
Success Tips
- Make sure your butter cubes are thoroughly frozen before wrapping them in the chicken; semi-soft butter will melt too quickly during assembly.
- Seal the chicken meat completely around the butter with no thin spots, otherwise the butter will leak out into the oil.
- Use a kitchen thermometer to verify your oil stays close to 350°F so the crust browns evenly without burning before the chicken is cooked through.
- Do not overcrowd the frying pan, as this causes the oil temperature to drop and makes the breading soggy.
Storage & Make-Ahead
Fridge: Store leftover cooked chicken balls in an airtight container in the refrigerator for up to 3 days. Reheat in an oven or air fryer to restore crispness.
Freezer: You can freeze the assembled, un-fried breaded chicken balls on a baking sheet, then transfer them to a freezer bag for up to 1 month. Fry from frozen, adding a couple of minutes to the cooking time.
FAQ
Can I bake these instead of frying them?
Frying gives the best, crispiest crust and helps seal the butter safely inside, but you can bake them at 400°F (200°C) for about 20 minutes, spraying them generously with oil beforehand.
Why did my butter leak out while cooking?
Leaking usually happens if there is a small gap or thin spot in the chicken wrapper, or if the butter was not frozen solid enough before assembly.
Can I use chicken breast instead of ground chicken?
This specific recipe relies on ground chicken to easily form balls around the butter. If using whole chicken breasts, you would need to slice pockets into them, which is a different technique.
Special Tools
Affiliate linksThe equipment that makes this recipe easier. Optional, but it helps.
As an Amazon Associate we earn from qualifying purchases. Links below are affiliate links, at no extra cost to you.