
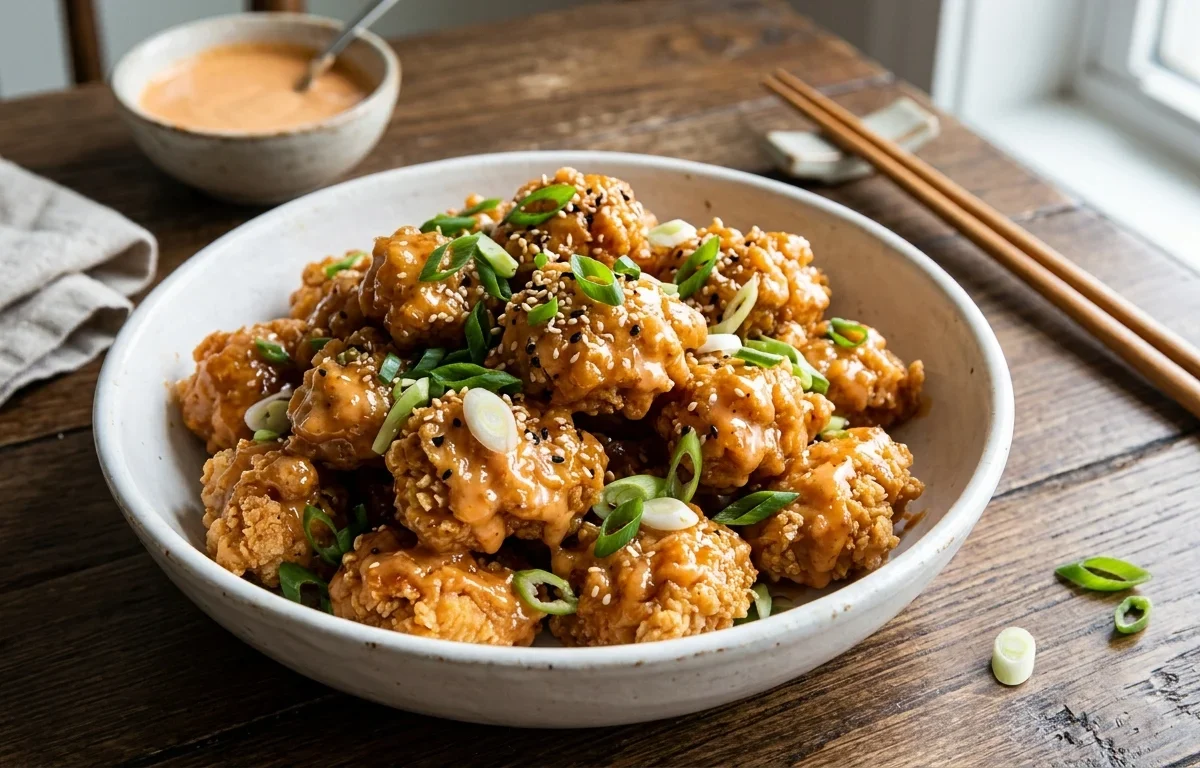
If you love bite-sized crispy chicken tossed in a creamy, sweet, and lightly spicy sauce, this home-cooked Bang Bang Chicken is about to become a staple in your kitchen. The secret to getting that satisfying restaurant-style crunch lies in using cornstarch for the dredge, which creates a crisp outer crust that holds onto the irresistible sauce without turning soggy right away. Best of all, it takes just 30 minutes from prep to table, making it an easy win for busy weeknights.
Why You'll Love This Recipe
- Ultra-crispy crust created by a pure cornstarch coating that stays crunchy under sauce.
- Balanced creamy, sweet, and tangy Bang Bang sauce with customizable heat levels.
- Quick 30-minute total cook time from prep to dinner table.
- Bite-sized format makes it ideal for dinners, meal prep, or party appetizers.
Ingredients You'll Need (and Why)
Buttermilk & Beaten Egg: The acid in buttermilk tenderizes the chicken, while combining it with egg creates an effective liquid binder that allows the dry dredge to adhere evenly.
Cornstarch: Cornstarch creates a lighter, crisper, and more glass-like crunch than pure wheat flour, preventing the chicken from absorbing excess oil.
Mayonnaise: Acts as the rich, creamy emulsified base of the Bang Bang sauce, carrying the sweet and spicy elements smoothly over every bite.
Sweet Thai Chili Sauce: Provides the essential sweet garlic and mild chili flavor profile that defines classic Bang Bang sauce.
Sriracha: Adds a garlic-chili punch and adjustable heat balance to contrast the sweetness of the chili sauce and honey.
Rice Vinegar or Lime Juice: A small touch of acidity cuts through the richness of the mayonnaise, keeping the sauce bright and balanced.
How to Make It
Mix the Signature Sauce
Starting with the sauce allows the flavors to meld together while you cook the chicken. Whisking the mayonnaise, sweet Thai chili sauce, Sriracha, honey, and rice vinegar together creates a smooth emulsion. Stashing it in the fridge keeps it chilled, which contrasts wonderfully with the hot, freshly fried chicken.
Dredge for Maximum Crispness
Seasoning the chicken in the buttermilk base ensures flavor penetrates the meat rather than staying just on the coating. Adding the beaten egg directly to the liquid bath simplifies the dredge. Pressing the wet pieces firmly into the cornstarch forms a solid coating that locks in moisture and browns evenly.
Fry to Golden Perfection
Frying in batches is crucial so the oil temperature doesn't drop, which can cause soggy chicken. Keeping the oil around 350°F gives you that deep golden color in 4 to 5 minutes while ensuring the chicken reaches a safe 165°F inside.
Toss and Garnish
Tossing the hot, drained chicken with the cold sauce right before serving creates a glossy coating across every piece. Finishing with fresh green onions and toasted sesame seeds adds bright color and a pleasant fresh crunch.
Success Tips
- Use a thermometer to keep the oil steady at 350°F (175°C); oil that is too cool makes the coating oily, while oil that is too hot burns the outside before the inside cooks.
- Avoid overcrowding the skillet; fry in 2 to 3 separate batches so the chicken cooks evenly and crisp.
- Drain cooked chicken on a wire rack over a baking sheet instead of paper towels if you want to keep the bottom layer extra crunchy.
- Toss with the sauce immediately before serving so the fried coating retains its satisfying crunch.
Variations
- Sub 3/4 cup flour and cornstarch combined (half and half) for a thicker, classic fried-chicken crust texture.
- Use boneless, skinless chicken thighs instead of breasts for extra juicy and forgiving meat.
- Adjust Sriracha up or down to easily customize the sauce heat from mild to extra spicy.
Storage & Make-Ahead
Fridge: Store leftovers in an airtight container in the refrigerator for up to 3 days. For best crispness, store cooked chicken and sauce separately if preparing ahead.
Freezer: Freeze unsauced, fried chicken pieces in a single layer for up to 2 months. Reheat in a 400°F oven or air fryer until hot and crisp before tossing with fresh Bang Bang sauce.