
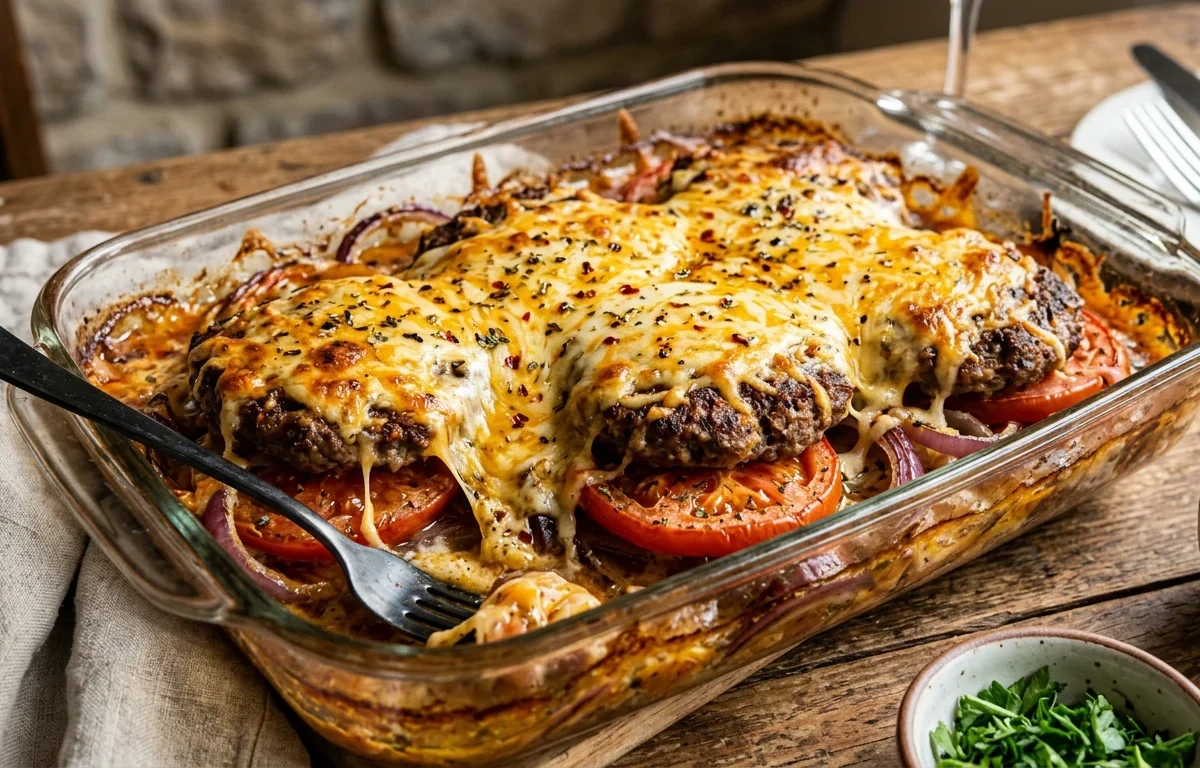
If you are searching for a fast, flavorful, and incredibly satisfying dinner that comes together in under 30 minutes, these Cheesy Baked Beef Patties are about to become your new favorite. By searing the beef first and then baking it directly over a colorful bed of sliced onions, tomatoes, and peppers, you lock in every drop of moisture while creating a built-in side dish. It is a hearty, low-carb comforting meal that the entire family will agree on.
Why You'll Love This Recipe
- Locks in Juices: Quick skillet searing creates a beautifully caramelized crust that keeps the patties incredibly moist during baking.
- Built-In Side Dish: Sliced onions, sweet tomatoes, and crisp peppers roast directly under the beef, absorbing all the savory pan drippings.
- Bubbly, Golden Finish: A generous topping of melted mozzarella or cheddar turns into a perfect, cheesy blanket in the oven.
- Perfect for Busy Weeknights: With just 10 minutes of hands-on prep, this easy dish gets a restaurant-quality meal on the table in no time.
Ingredients You'll Need (and Why)
Beef Patties: Using patties around 1/3 pound ensures they are thick enough to get a deep, flavorful exterior sear without overcooking in the center when they head to the oven.
Onions and Tomatoes: These act as a natural steaming rack in the baking dish. As they bake, they release moisture that keeps the beef succulent while absorbing the rich seasoned drippings.
Green Bell Pepper or Jalapeño: Bell pepper adds a sweet, mild crunch to the base, while jalapeño brings a vibrant, spicy contrast that balances the rich cheese.
Mozzarella or Cheddar: Mozzarella gives you that classic, dramatic cheese pull, whereas cheddar provides a sharp, robust flavor depth that pairs beautifully with beef.
How to Make It
Season and Sear
Start by generously seasoning your beef patties with salt and freshly cracked black pepper. To get a perfect caramelized crust, heat your oil or butter in a skillet until it is smoking hot before adding the meat. Sear the patties for just 2 to 3 minutes per side—we are not cooking them through yet, just locking in the juices and building deep, savory flavor.
Assemble the Vegetable Bed
In your baking dish, arrange the freshly sliced onions, tomatoes, and your choice of peppers in an even layer. This creates an aromatic vegetable bed. Place your hot, seared beef patties directly on top. As the dish bakes, the beef will finish cooking, and its savory juices will run down to flavor and tenderize the vegetables below.
Bake to Cheesy Perfection
Mound your shredded mozzarella or cheddar cheese directly over each beef patty. Bake at 400°F (200°C) for 10 to 12 minutes. The intense oven heat will soften the vegetables, cook the beef to a perfect, juicy temperature, and transform the cheese into a bubbly, golden-brown crown.
Success Tips
- Don't Overcrowd the Skillet: If your pan is small, sear the patties in two batches so they truly brown and crust rather than steam.
- Use Freshly Shredded Cheese: Pre-bagged shredded cheese contains anti-caking agents that can prevent it from melting into a perfectly smooth, stretchy layer.
- Let It Rest: Give the dish about 3 to 5 minutes to rest after removing it from the oven so the juices redistribute within the meat.
- Adjust the Slice Thickness: Slice your onions and peppers relatively thin so they cook through and soften in the short 10-12 minute baking window.
Variations
- Mushroom Swiss: Layer sautéed mushrooms with the onions under the beef, and top with Swiss cheese.
- Spicy Popper style: Use sliced jalapeños and top each patty with a dollop of cream cheese before covering with cheddar.
- Italian Style: Season the beef with Italian herbs and top with mozzarella and a spoonful of marinara sauce.
Storage & Make-Ahead
Fridge: Store leftover beef patties and vegetables in an airtight container in the refrigerator for up to 3 to 4 days. Reheat in a 350°F oven until warmed through.
Freezer: You can freeze the cooked beef patties alone for up to 2 months. Note that the tomato and pepper vegetable base does not freeze and thaw well, so it is best to make that fresh.
FAQ
Can I make this with ground turkey or chicken?
Absolutely! Ground turkey or chicken patties work beautifully. Just ensure they reach an internal temperature of 165°F (74°C) when baked.
Do I need to grease the baking dish?
No extra grease is necessary. The sliced tomatoes and onions release natural moisture, and the drippings from the beef prevent sticking.
What is the best way to reheat leftovers?
To keep the patties juicy, reheat them in a baking dish covered with foil at 350°F (175°C) for about 10 minutes, or microwave gently on medium power.